Check out our Astoria Fishing Charters and Washington Halibut Charters
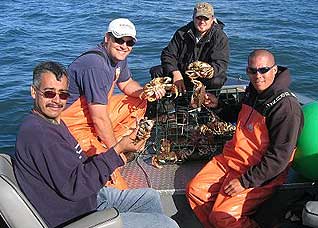
Crabbing is a lot of fun and an inexpensive and rewarding way for the whole family to get out and enjoy a day on the water with the added reward of catching a great meal!
This article focuses on crab fishing for Dungeness crab but could be applied to harvest other types of crab, make sure you check your local regulations before heading to the water.
Location
Dungeness Crab are found in the Pacific Ocean, its river estuaries, and bays. They inhabit the ocean and bays from as far south as Santa Barbara, California all the way north to the Pribilof Islands in Alaska, and every bay and river entrance in between.
This large population and wide distribution makes them a very popular target for recreational crabbers as well as an important economic resource for commercial crabbers and coastal communities.
When looking for a great place to catch Dungeness, remember that the general rule is “the closer to the ocean the better”. Dungeness need saltwater to survive and they find high levels of freshwater to be toxic. The higher the salinity, the more crabs you’re going to find.
Dungeness Crab can be found on all bottom types but the preferred bottom material for an adult Dungeness is sand or sandy mud.
Best time of day for crab fishing – incoming tide.
The best time of the day to catch Dungeness Crab is during the incoming tide. This tide doesn’t flow as hard as the outgoing tide and it’s easier for the crabs to walk around without fighting heavy current or getting washed away. The incoming tide also has a higher salinity so it is more comfortable for them.
When crab fishing in rivers you will find that the outgoing tide combined with the river’s flow is much stronger than the incoming tide and it’s a frequent occurrence for a crabber to start dropping their gear, just to watch the pot, line and floats all go under. The heavy outgoing current can suck your floats under. Don’t worry you can still get it back … as long as you weighted your pot heavily, it won’t go anywhere. You just have to wait for the tide to go slack and your floats will pop up.
Best time of year for crabbing.
Crabbing is best from July through December and the quality of the crab and their numbers get progressively better as this season progresses.
Because of the crabs’ aversion to freshwater, crabbers find that crabbing in river mouths and estuaries during winter and spring months (January through June) is not nearly as productive as crabbing in the same locations from July to December. The rains and associated high runoff push the Dungeness to the extreme lower reaches of the bays or completely out to into the ocean.
During the late summer, fall, and early winter months the crabs don’t smell the freshwater and they make their way back into the coastal bays. July typically marks the beginning of recreational crabbing season here in Oregon. In July we have an abundance of crab but the condition of the crabs varies from year to year and location to location.
Dungeness spawn during spring and early summer months, at this time the females shell will be very soft, but the males shell will be hard. Hard shelled crab are also know as “full crab” because they are full of meat. Hard Dungeness are preferred over soft crab and in some locations it is unlawful to harvest soft shelled Dungeness.
So in July you can sometimes find the right combination of conditions where there are a good number of crabs inshore because the salinity/temperature levels are right and the males are still hard shelled. Some years this is the case and you can catch good numbers of full males that have yet to molt and lose their shell. During other years the spawn happens early, the majority of the males have molted by July, and have put all of their body mass (meat) into making their new shell and aren’t worth keeping.
As summer progresses into fall and early winter, the crabbing just gets better and better. The peak month is generally December before the inshore water temperature gets too cold and the freshwater arrives from heavy rains or snow melt.
How to catch Dungeness Crab
There are almost as many ways to capture a crab as there are ways to catch a mouse! Every year we see new revisions of the tried and true crab trap or pot and new explanations on why this new type works better than its predecessors.
Ultimately there are three different approaches to catching Dungeness Crabs; pots or traps, rings, and snares. We are going to go into detail about each of these methods.
Crab Pots
Crab Pots also know as crab traps come in a variety of shapes and sizes, are a typically made out of a steel support structure covered with woven stainless wire, or made of a heavy wire cage/grid.
We are going to break these crab pots into two types; the traditional steel with stainless mesh variety, and the econo wire cage variety.
Traditional Style Crab Pot
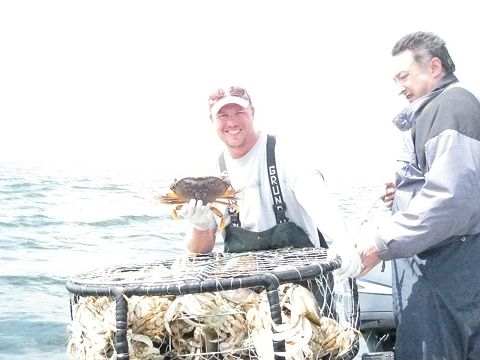
This style of pot is heavy duty and durable. These in my opinion are the best all around pot to use, however they are expensive.
Advantages:
Traditional pots fish well for extended periods of time soaking unattended.
Crabs are well trapped and can’t get out easily. The crab entrance on this style of crab pot are centered on the sides of the pot, with a ramped wire rectangular tunnel leading to the door. When the crab follows the short tunnel and enters the door he then drops off of the tunnel down to the floor of the trap. Since the door of the trap is raised up off of the bottom, it keeps the new crabs from easily blocking the door open and allowing the existing crabs to escape.
This style is the heaviest because of the steel structure, but their weight varies depending on the amount of steel used. Most come with added steel re-bar weights so they don’t drift away during heavy tidal or current flows. Get the heaviest pots you can handle, you don’t want them moving around once you drop them.
Durability. If you buy quality pots and take care of them, they are going to last you a long time.
If they get partially buried in the sand they won’t easily deform or break when you use the boat or heavy engine driven pot puller to pull them loose of the sand.
This style is large and holds the most crab of any option available.
If you get the really big ones (we’re talking commercial size) and someone tries to pull your pot to steal your crab… they are only going to try (maybe unsuccessfully) once because these babies are heavy and they are really heavy when they have 50 keepers plus all of the throw backs in them! Thieves don’t want to work hard.
Disadvantages:
These pots are the most expensive option. Quality doesn’t come cheap and spending $80 to $130 per pot is typical depending on the size and construction.
Traditional crab pots have raised doors, so it requires the crab to do a little bit of climbing and searching to find the entrance, so these traps don’t fill as fast as the cage variety or rings.
Heavy and take up a large amount of space in the boat and wherever they are being stored.
Hard to lift into the boat because they are heavy to begin with, and they are much heavier when filled with crab.
Plastic Coated Wire Cage Style Crab Pot
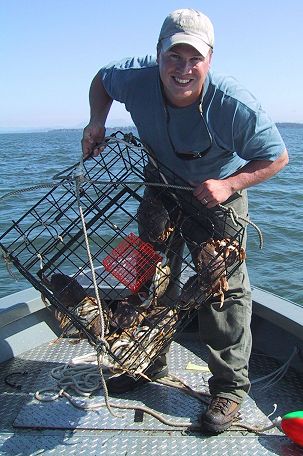
These aren’t pots that are intended to be left soaking, or unattended for extended periods of time. This style works best when it’s checked frequently and not left overnight. A lot of folks think crabbing is a set it and forget it type of sport, but with pots like these you don’t have that luxury. If you want to drop the pot and come back whenever you want, but not risk having your crabs get away or your pot getting washed away, you really need the heavy traditional variety.
Because of their design, if you are checking and re-baiting this style of pot every 45-60 minutes, they will hands down out fish all of the other options out there. They fish really fast. Crab can get in these pots quickly and if you pull the pot before the bait is gone and before problems can start occurring, then you can limit really fast!
Advantages:
Cheaper than traditional style pots.
Lighter in weight and can often be collapsed for easier storage.
This style of pot fishes fast! These pots fill with crab quickly. This is because each of their 4 doors (traditional pots only have two doors) being level with the river/bay bottom the crab doesn’t have any climbing to do to find their way inside.
Disadvantages:
Doors are level with the river/bay bottom which means that if the door is blocked open by an entering crab, stick etc, then the other crabs can and do get out once there is no bait left for them to eat. (They can eat all of the bait really fast, often in less than 45 minutes depending on how you rigged your bait.)
This is something that most crabbers using this style of pot don’t realize … having four doors means that one of the doors will always be facing into the current/tide and can be easily opened by the flowing water pressure especially if the door gets coated with drifting seaweed. More seaweed = more water resistance = open door. When this happens your dinner escapes! Traditional pots with only two doors and the doors being raised aren’t as susceptible to this problem.
These pots rust easily and don’t have the life expectancy of a traditional pot. With low to moderate recreational use you can expect to get three to five years from this style.
Cage style pots lack the heavy rebar weights and support structure which makes them light weight. Light weight pots are easily pushed around by tides and currents. These should be used in very light current or be weighted with rebar or bricks to keep them anchored in place.
I often hear of “stolen pots” when in reality the crabber just lost their un-weighted pots to the tide because they were washed away.
These pots aren’t typically as large as the traditional variety which means they don’t hold as many crab.
These pots may be cheaper but when you’re losing the pots or not catching as many crabs, their low price starts to go up.
Crab Rings
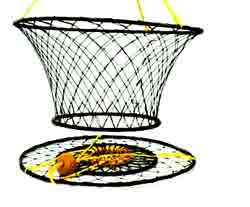
There are two types of crab rings. The typical basket style where you have an inner ring covered in mesh with the mesh extending to an outer ring. Ropes attach to the outer ring, when these ropes connected to the main line get pulled the outer ring lifts and the whole unit becomes a basket which holds the crab as this is pulled to the surface. Crabs can and do crawl out as these are being lifted to the surface.
Crabs aren’t trapped in this device, they are able to come and go as they please, and they go quickly when the bait is gone.
The second type of crab ring is somewhat of a combination ring/pot device. It has a steel support structure with a wire mesh top and bottom but with raisable/lowerable sides made of nylon mesh. When this ring hits the bottom the sides fall down and the crab can enter, but when the crabber pulls on the line to raise the ring to the surface, the sides lift and the crabs are trapped during their journey to the surface.
Crab rings are not made to be left unattended. This is for active crabbing only. You want to have good bait and you only let the ring soak for 5 to 15 minutes before checking it.
Obviously with this setup if you aren’t checking it frequently the crabs are going to leave when the bait is gone.
Crab rings because of their light weight, are easy to pull and are typically used from docks where they can be lowered or thrown out away from the dock.
Crab Snares (Crab Angling)
Crab snares are generally made to be cast out with a rod and reel. The most commonly seen of these devices is the “Noose” variety which has a stainless steel ring, or small bait box, with heavy plastic (heavy weed eater line) slip nooses extending from it. Bait is placed in the middle of the ring/box, the crab eat upon this bait, and when the crab angler reels in they hope the slip nooses tighten around one or more crabs.
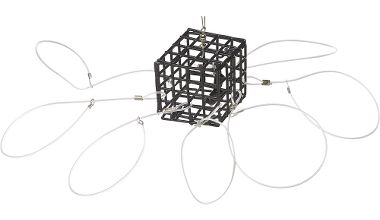
There are assorted other varieties as well. All in all this is really a device that is great for kids that want to have fun catching crab but not an adequate tool for folks that are serious about obtaining a limit. However if crabbing access is limited to locations such as beaches, jetties, or break waters this may be the only realistic solution.
Crab Bait
What’s the best crab bait? Ask 100 people and you’re probably going to get 100 different answers. Everyone has their own little secret method it seems.
Commercial crabbers use a lot of sardines; they buy these in large frozen blocks and chunk or chop these blocks into manageable sizes and bait their pots. They also use a lot of the same stuff that recreational crabbers use.
This is the list of bait that I use in the order that I would use it, if obtaining it, and cost weren’t an issue.
-
Raw Albacore Tuna (not the canned variety), American Shad.
-
Sardines (not the canned variety), Salmon carcasses.
-
Canned cat food, canned tuna, canned mackerel. Poke holes in the can and wire it to the pot/ring or dump the contents of the can into a bait jar.
-
Raw Chicken, Turkey legs. Don’t forget you can get salmonella poisoning from raw poultry. Don’t let the kids bait the crab pots and then eat a sandwich. Wash your hands after baiting. One advantage of poultry is that sea lions and seals won’t eat it, so if you’re having a problem with these critters chicken/turkey is a good bet. It’s also a very durable long lasting bait.
-
There are places where you can buy mink. I know what you’re thinking. Yes, the furry little animal they make coats out of. I mean really … what did you think happened to the rest of the animal after they took its skin off? Yes, they sell it to crabbers on the Oregon coast and probably other places as well. Is it great bait? No … but the crabs eat it, the seals won’t, and it’s often readily available at the same place you rent your crab rings. What do you tell the kids? I don’t know, but whatever you do don’t tell them it’s a Weiner Dog … I’ve seen the fall out from this one and I’m here to tell you, it’s ugly!
-
Filleted out bottom fish that they sell you when you rent your crab rings. Guys this is a losing deal. These bottom fish are filleted by folks who make it their whole mission in life to not leave an ounce of meat on that carcass. It isn’t great crab bait. The crabs pick clean in short order whatever morsel of flesh was left on those bones, and bare bones don’t make good crab bait. Now what do you do? You have to head back to the crab ring rental guy to buy more bait. If this sounds like a good deal to you then I want to sell you a really cheap printer and some expensive ink cartridges. Bring cheap canned tuna and turkey legs instead.
How to bait your crab pots
(This is mainly for pots, but if modified could apply to rings as well.)
This is a really simple deal but a lot of folks don’t understand it until it’s explained to them. Crabs like to eat. Use a lot of bait in your pots and you are going to send out a lot of scent attracting a lot of crabs who in turn are going to start eating your big pile of bait which in turn is going to make noise and release smell and attract more crabs!
Use a lot of bait, really load that pot up!
There are a few different ways to place your bait in the pot. Bait boxes and bags are the most preffered methods because they enclose the bait keeping the crab from getting at it easily.
Bait bags also known as Chewy Bags allow you to hang a lot of bait in the pot. These are also nice when you want to prep at home and fill the bags there instead of doing in on the water.
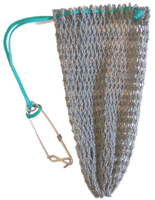
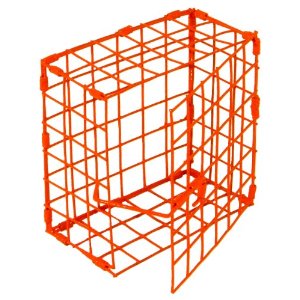
If you’re soaking your pots for a long period of time then use a bait cage or a chewy bag for your main bait and use a bait can/jar for your bonus bait.
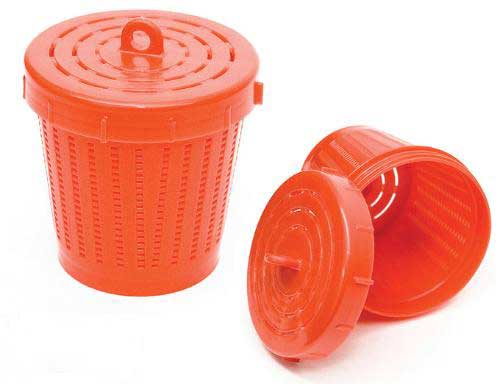
If you’re actively fishing your pots, i.e. pulling them every couple of hours then I wouldn’t worry about the bonus bait; but I would heavily bait my pots with twice as much bait as I think I need, and then load it up again every time I pulled them. This needs to be your motto when baiting crab pots … “If a lot of bait is good then a ton is better!”
Load those pots with a lot of high quality bait, and don’t skimp on bait, you came a long way and are spending a lot of time and money to catch crab, so do it right.
Rigging the crab pot, line, and floats.
Crab Line
I typically use 75’ of crab line and I crab in 40’ of water or less with a double float setup. When rigging your pots you really need to have a scope of 2:1 or even 3:1. At least two to three times the depth of water you may find yourself crabbing in. Why so much? This extra line compensates for the current and tide pulling against the rope and allows the rope to angle back and keeps your floats from getting sucked under water.
Using the correct type of rope is critical. Too often I see crab buoys floating with 100 feet of yellow polypropylene rope trailing behind them. This yellow rope floats on the surface and will entangle your boat prop and the prop of other boaters and is a serious boating hazard. In some states it is illegal to use floating rope such as this. Crabbers try to use this rope because it’s cheap, but that isn’t an acceptable reason considering the danger you are putting someone else in because you want to save a few bucks. If you insist on using this rope, don’t be surprised if you come back to your pots to find that one or more has been run over by a boat and the line has been chopped off by their captain when he had to cut it loose from his prop. It happens all the time.
The correct rope for rigging your crab pot is not available at the local hardware store, you can only get it at sporting good or maritime supply stores. A common name brand for crab rope is “Blue Steel Crab Line” also generically referred to as lead line. This rope is bluish grey or greenish grey in color, is moderately stiff (keeps the knots and tangles down), and most importantly it sinks rapidly.
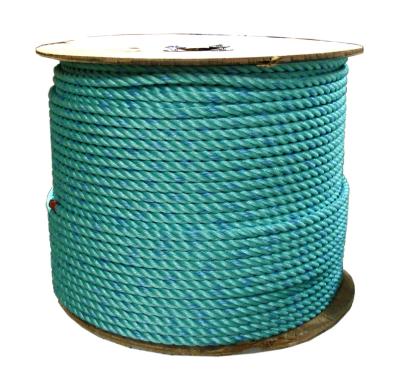
If you can’t order lead line and you don’t have access to a store that sells it, buying nylon rope from the hardware store will work. Make sure it is nylon, it’s soft and white and it will sink. The yellow rope and the multi color braided ropes you see are made from polypropylene, this material floats, this material is designed to be used as docking rope or for other applications, but definitely not for crab line and certainly not as a boats anchor rope.
Attaching the crab line to the traditional (heavy steel construction) round pot
If you bought your crab line in a pre-measured length with a loop already created in one end, you’re one step ahead of the game. If your crab line doesn’t have a loop in one end, go ahead and create one by doubling the line over and tying a double overhand knot.
Next take this loop and go twice around the top edge of the pot where one of the side supports attaches. I like to tie onto the pot on one of the sides, not on the door side but not directly opposite of the door either. If the outside middle of the door was 12 o’clock I like to tie in at 9:00 or 3:00. Now pass the top end of the line through the loop and draw the loop up tight.
We tie onto these pots in one location rather then having four ropes coming together at a central point and then attaching this to the main line. The reason we use this single point method for tying onto the pot is because when you soak crab pots for an extended period of time they can settle into the bottom and get partially buried. If you were tied onto the pot in four locations the pulling force would be evenly distributed across the pot and it would be very difficult to get it broken free from the bottom. Tying onto one side of the pot allows that side to be lifted and released from the bottom with the rest of the pot then pulling out. The other method tries to force the whole pot out at once.
Attaching the crab line to the cage style (plastic coated wire) pot
Attach two ropes in a rectangle pattern at four points on the top of the pot. Make sure you allow enough room for the lid to open. The ropes should cross in the middle of the pot, at this intersection tie in your main line.
Crab pot floats
In some states like Washington it is the law that you use a red and white crab float and your name, address and phone number must be written on it. In other states this is not required; however it is still very important to be able to explicitly identify your floats.
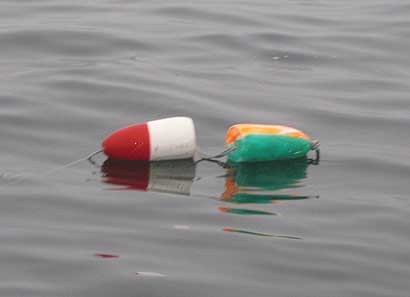
I have found over the years that using two floats is a great way to identify your pots and also helps keep your floats above water. Most crabbers only use one float and if there is a strong tide or current this one float can easily be pulled under water.
Rig your floats with the nose (pointy end) down, (toward the pot) so the flat end is facing up. This makes them more streamlined and creates less drag on the line which could dislodge your your pots and allow them to be swept away. Tie the first buoy in place nose down about 7 or 8 feet down the line from the top end; secure it in place on the line with a large knot in front of and behind the buoy. After the bottom buoy is in place secure the top buoy in place allowing a gap between the buoys of four to five feet. This gap allows the bottom buoy to take the brunt of the being sucked under wave/tide action while still keeping the top buoy floating. The double float setup with this gap also provides a great place for you to grab the line when you are retrieving your pots.
Pulling your pots
This is assuming your crabbing from a boat. When it’s time to pull your first pot, make sure you approach it from the down current side, this way you can slowly approach your crab pot and not overrun it because the current is pushing you along.
I like to pull the pots over the side rather than over the bow, there is more room to work inside the boat and less likely that someone is going to fall over board.
An extendable boat hook is great for hooking your floats so you can bringing the line and floats into the boat so the pot can be pulled up.
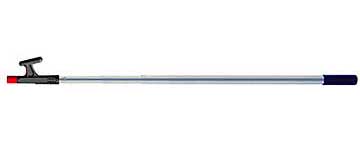
Remember crab pots can damage the gel coat and paint on any boat so if you care about this make sure you tell your helpers to not hit the boat with the pot and to not rest the pot on the side of the boat. This isn’t something people don’t realize until it’s often too late. Alternatively you can place a large rug or rubber mat over the rail and side of the boat to protect it.
Measuring your crab
You’re only allowed to keep male Dungeness crab, check your local regulations for size, seasons and limits.
You need a couple crab gauges also called calipers, preferably the variety that are aluminum or stainless. Stay away from the plastic variety because they break easily and you are left with nothing to measure the crab.
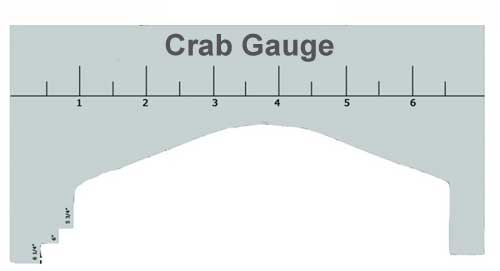
Dungeness Crab are measured across the top of their backs in front of the horns that stick out from their shell. Remember it either is or it isn’t a keeper, there is no maybe or close enough. The shell has to be touching on both sides of the gauge. Hold the gauge level across the crabs back, pushed up against the horns, if there is any gap at all then it is an undersize crab.
Storing your crab after catching it.
5 gallon buckets work great because they are light, they stack well, and they can be used throughout the trip for a variety of chores.
This is the most important thing to remember after you throw your crabs in a bucket. Crabs need oxygen. 15 crabs in a bucket full of water can deplete that water’s oxygen level fairly fast, especially if it is warm out. You need to make sure you’re changing the water out on a regular basis or your catch is going to die. When crabs die they start to spoil, and they spoil even faster in warmer temperatures. Spoiled crab and seafood will make you sick like you wouldn’t believe!
If your catch looks lethargic go ahead and give them some new water. Even if they don’t look lethargic don’t be afraid to freshen up their water.
Cleaning your catch
There are two approaches to cleaning Dungeness crab. Cook them whole and then clean them, or clean them and then cook them.
If you cook them whole, you don’t have to worry about killing them to clean them. The downside to this method is that whole crabs take up more room in the pot then do cleaned crab. You will either need a bigger pot or be happy with cooking fewer at a time.
If you clean them first, you will need to kill them. One easy way is to hit them between the eyes with a hatchet or heavy knife. Another approach is to put them into the boiling water for a few seconds and then pull them out with tongs and then clean them.
Crab are cleaned by removing the top of the shell from the main part of their body. Grip the shell from the rear, just under its edge, and pull it up and forward until it comes completely off. It takes a little effort but it shouldn’t be very difficult to remove.
Now flip the crab over and pulling from the rear forward, remove the long pointy part of the shell that is used to tell if it is a male or female.
Using running water clean all of the yellow guts and anything else that doesn’t look like meat out from the inside of the shell.
Cook them now or if they’re already cooked put them in a bag on ice.
Cooking Crabs
Dungeness crab are cooked by boiling them, get the water boiling as soon as you can. If you’re using a large crab cooker with a lot of water in it, it’s going to take up to a half an hour to get the water up to a boil. Get this water boiling while you are cleaning the crab or call home or back to the dock and have someone start the water boiling so it is ready when you get there.
There are several varieties of packaged “Crab Boil” available that you can add to your boiling water to season and flavor your crab. Personally I just prefer to add several large handfuls of rock salt to the water and call it good. Many people are afraid of over salting the water but I’ve personally never found a level of salt that was too much but I’ve definitely seen too little.
Bring the water to a boil, drop the crabs in the pot and then boil the crab for 16 – 20 minutes. Since inserting the crab dramatically lowers the boiling water’s temperature, the 16 to 20 minutes begins after the water is boiling again.
After cooking the crab, ice them down by putting them in a plastic bag covered above and below with ice, many people just put the crab directly on ice but when the ice melts the freshwater washes much of the flavor out of your crab. Use lots of ice! This is seafood and it needs to get cold as soon as possible and needs to be kept cold.
Important Conservation Notes
Folks it’s important that if you’re going to go crabbing that you are aware of the long term impact that a lost crab pot can have on the environment.
Please use adequate gear for the location you’re crabbing so that it doesn’t get swept away or pulled under and lost; only to have it kill crabs, and fish for months or even years to come.
Lost pots are called ghost pots and they take several years to rust away and probably even longer for the ropes to disintegrate. In the meantime they present a hazard to wildlife, boaters, and fishermen who can get the rope caught in their boat prop or snag it with their fishing gear.
Please use long enough rope (sinking crab rope), multiple floats on each line, and weight the pot heavily so it stays where you drop it. If you have never crabbed before don’t just assume it’s going to be ok, make sure you follow these rules or you’re going to lose your gear and have a frustrating experience.
The author, Kevin Newell, and his wife Lacey DeWeert are professional fishing guides in Oregon and Washington!
Copyright 2012 Total Fisherman™

